33. ListView - 1

01.
더보기

1.

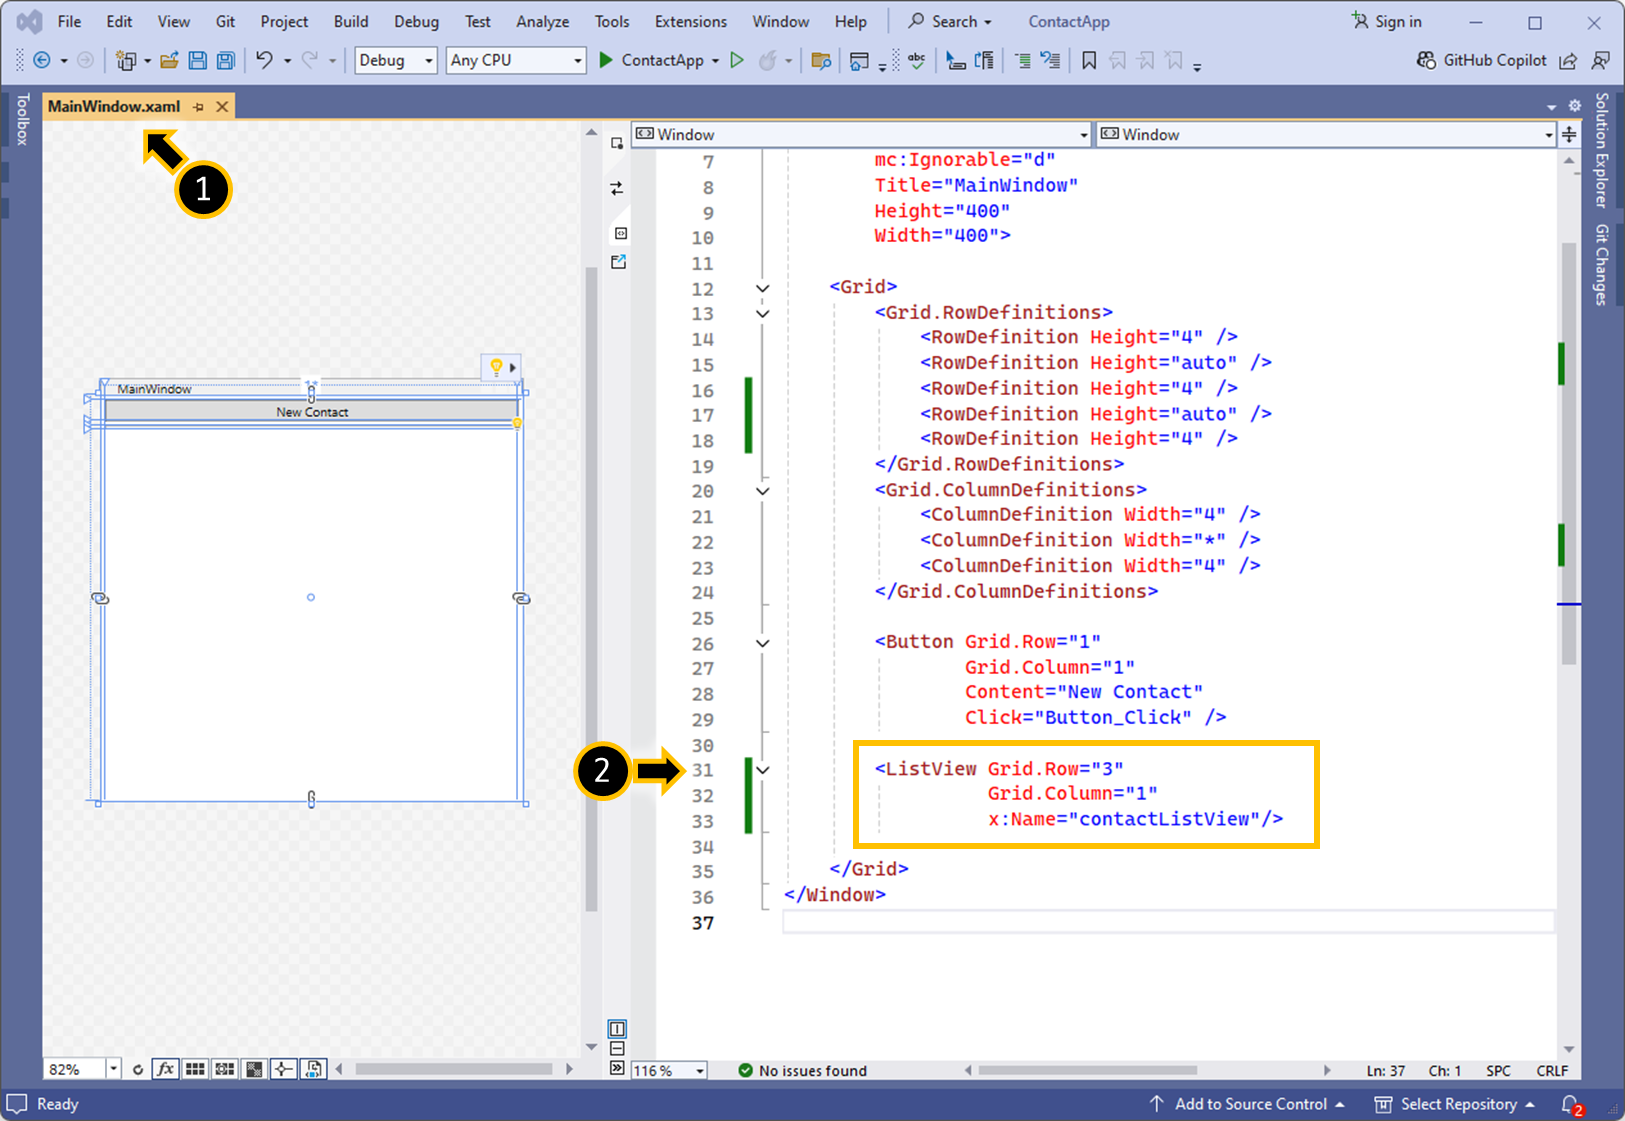
<ListView Grid.Row="3"
          Grid.Column="1"
          x:Name="contactListView"/>
2.

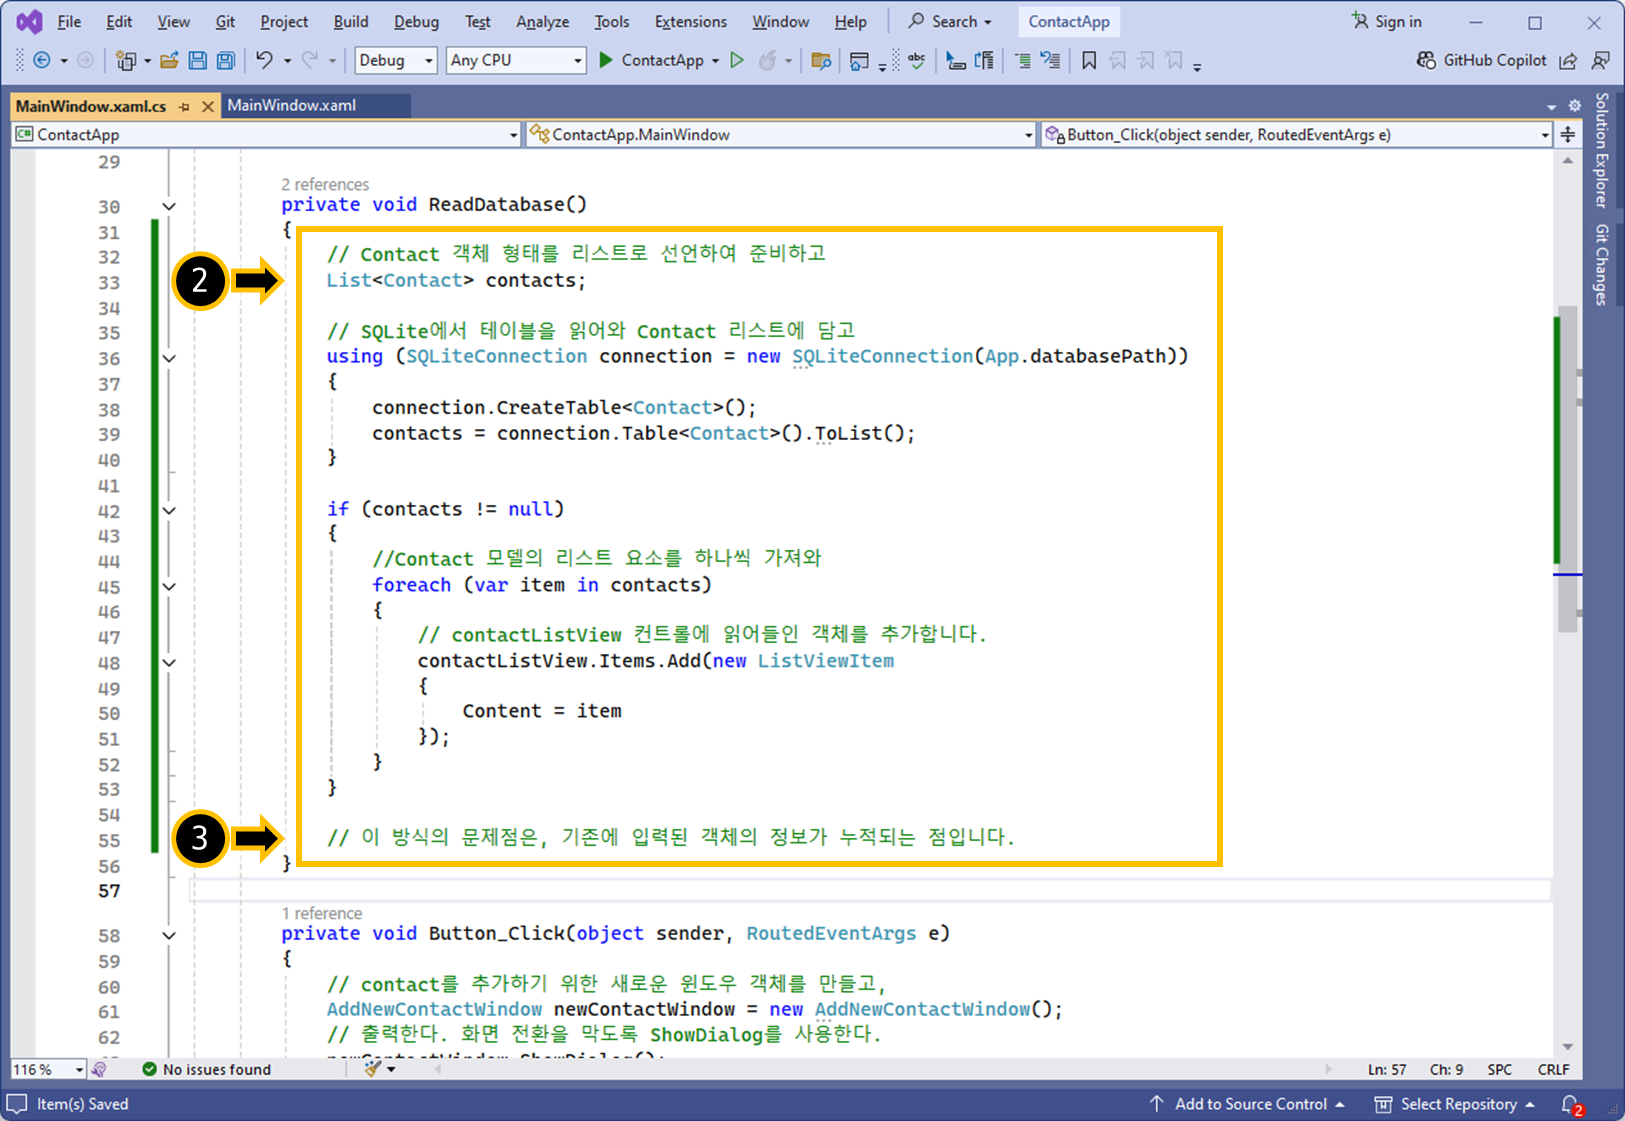
// Contact 객체 형태를 리스트로 선언하여 준비하고
List<Contact> contacts;

// SQLite에서 테이블을 읽어와 Contact 리스트에 담고
using (SQLiteConnection connection = new SQLiteConnection(App.databasePath))
{
    connection.CreateTable<Contact>();
    contacts = connection.Table<Contact>().ToList();
}

if (contacts != null)
{
    //Contact 모델의 리스트 요소를 하나씩 가져와
    foreach (var item in contacts)
    {
        // contactListView 컨트롤에 읽어들인 객체를 추가합니다.
        contactListView.Items.Add(new ListViewItem
        {
            Content = item
        });
    }
}

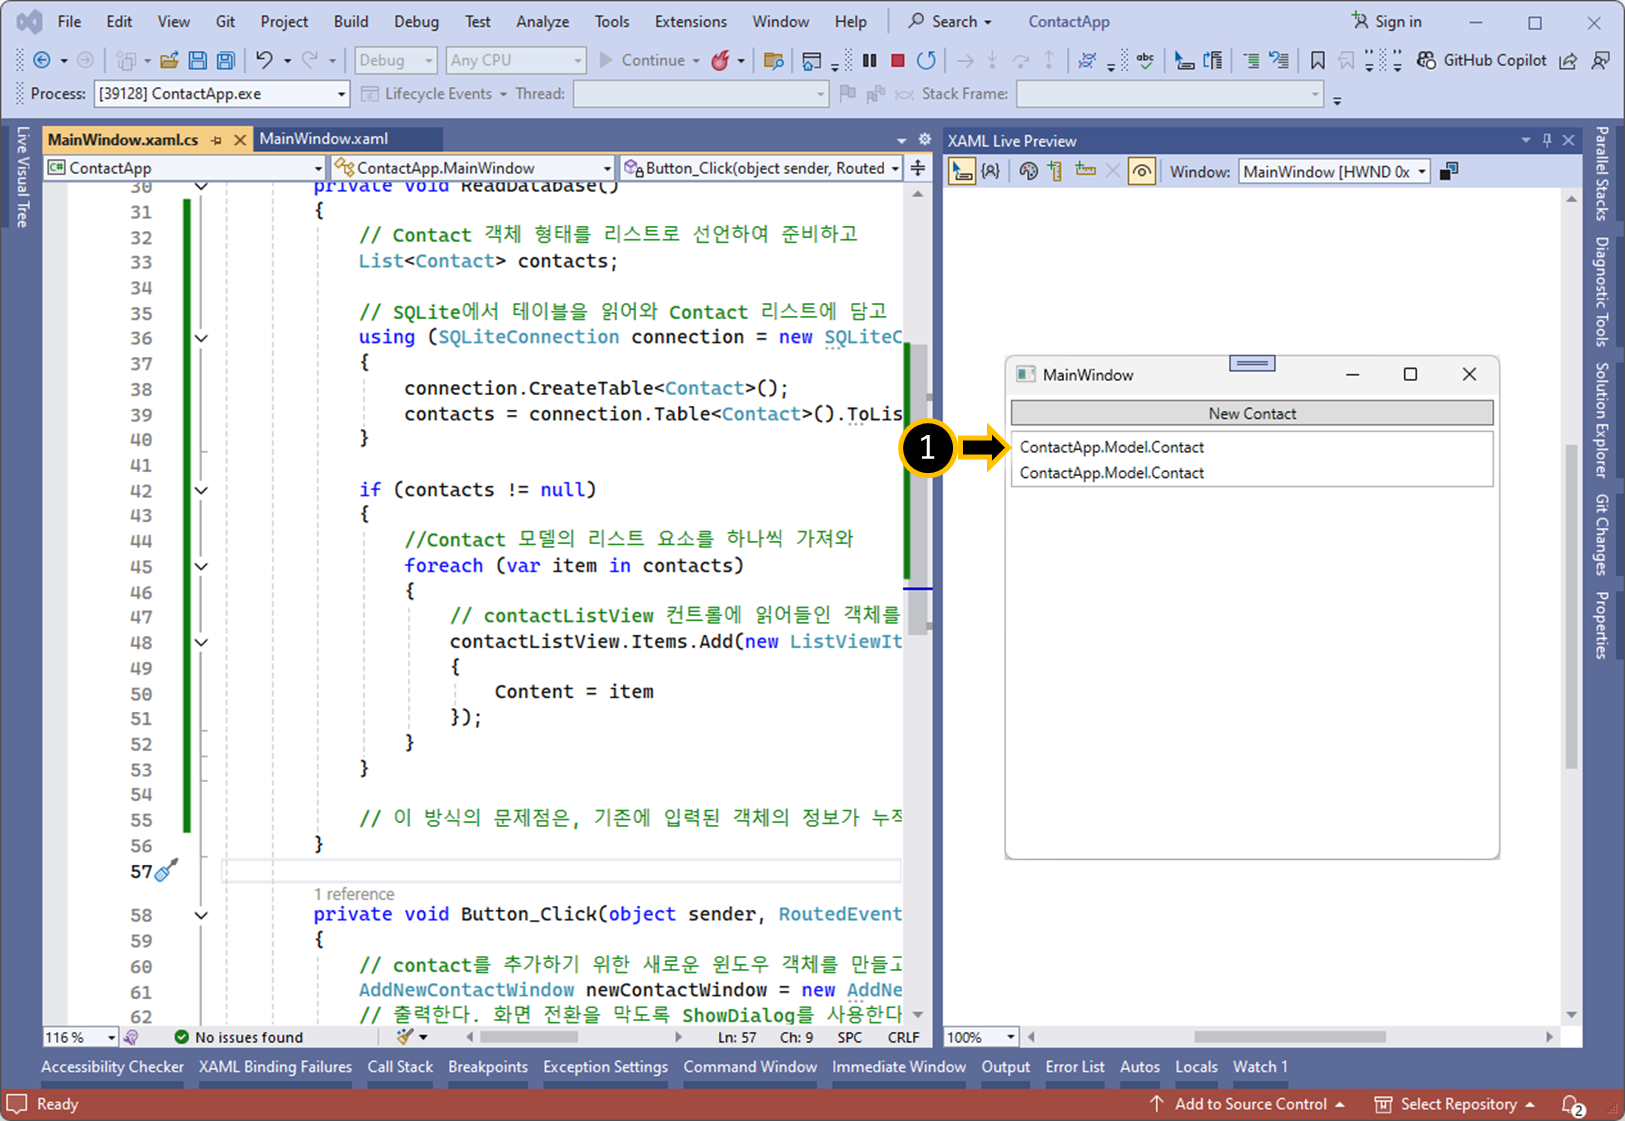
// 이 방식의 문제점은, 기존에 입력된 객체의 정보가 누적되는 점입니다.
3.

// contact 추가시, 이전 로드된 데이터는 UI에서 사라지도록 구현합니다.
contactListView.ItemsSource = contacts;
4.

02.
더보기


1.


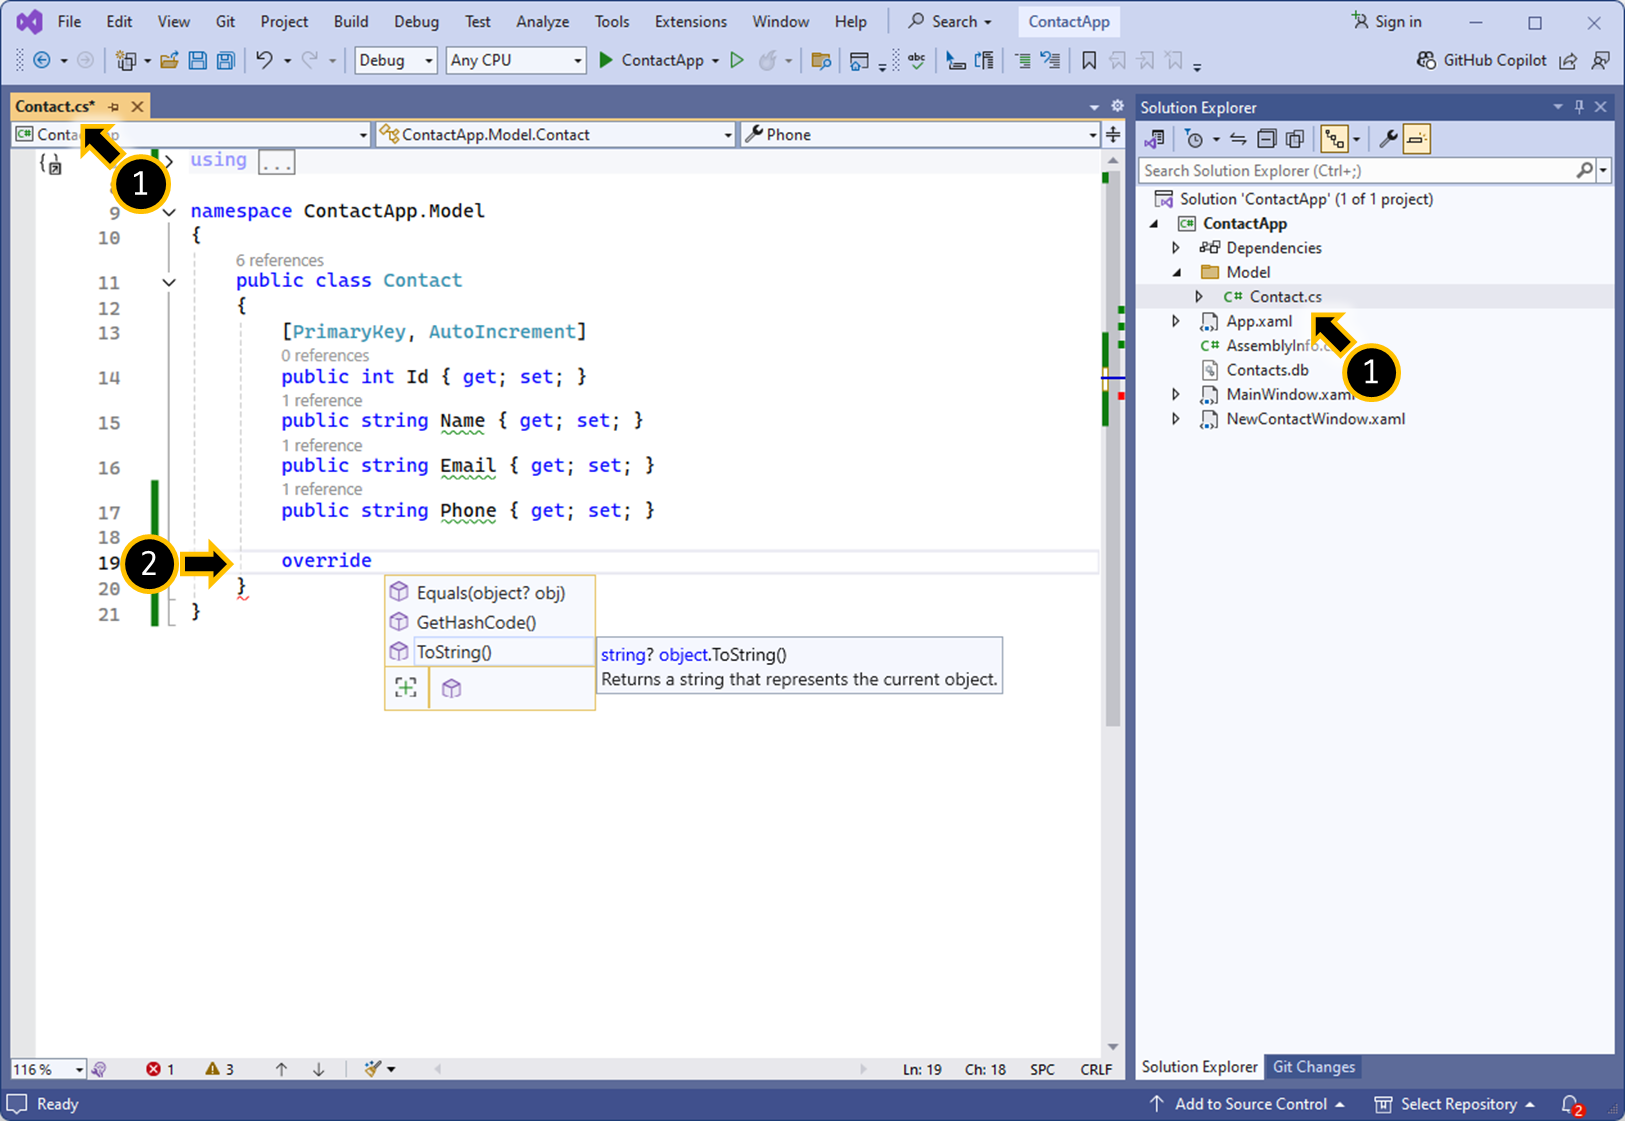
public override string ToString()
{
    return $"{Name} - {Email} - {Phone}";
}
2.

03.
더보기


1.


 <!-- 데이터 바인딩 X -->
 <ListView.ItemTemplate>
     <DataTemplate>
         <StackPanel>
             <TextBlock FontSize="20"
                        FontWeight="Bold"/>
             <TextBlock FontSize="15"
                        Foreground="DodgerBlue"/>
             <TextBlock FontSize="15"
                        FontStyle="Italic"/>
         </StackPanel>
     </DataTemplate>
 </ListView.ItemTemplate>
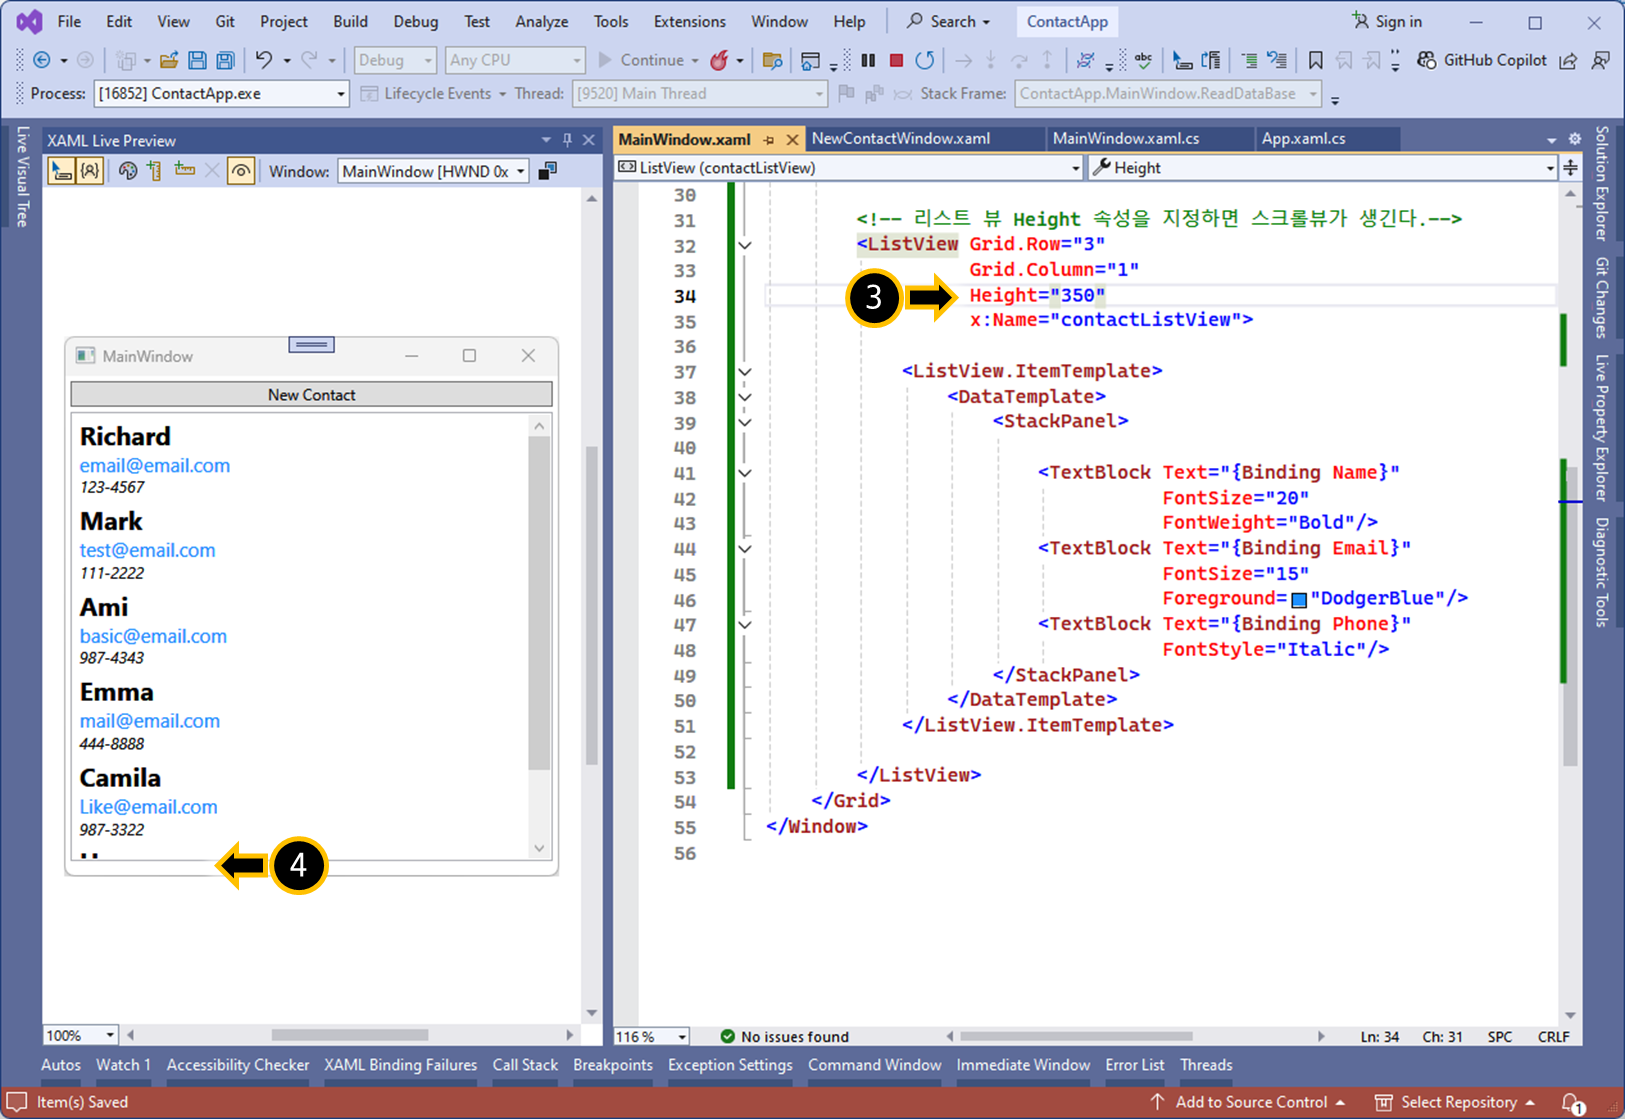
2.


<ListView.ItemTemplate>
    <DataTemplate>
        <StackPanel>

            <!--데이터 바인딩 Contact 객체의 Name 필드-->
            <TextBlock Text="{Binding Name}"
                       FontSize="20"
                       FontWeight="Bold"/>

            <!--데이터 바인딩 Contact 객체의 Email 필드-->
            <TextBlock Text="{Binding Email}"
                       FontSize="15"
                       Foreground="DodgerBlue"/>

            <!--데이터 바인딩 Contact 객체의 Phone 필드-->
            <TextBlock Text="{Binding Phone}"
                       FontStyle="Italic"/>
        </StackPanel>
    </DataTemplate>
</ListView.ItemTemplate>
04.
더보기

1.

2.

05.